This is where to place your order for Sr. Dragster Wraps
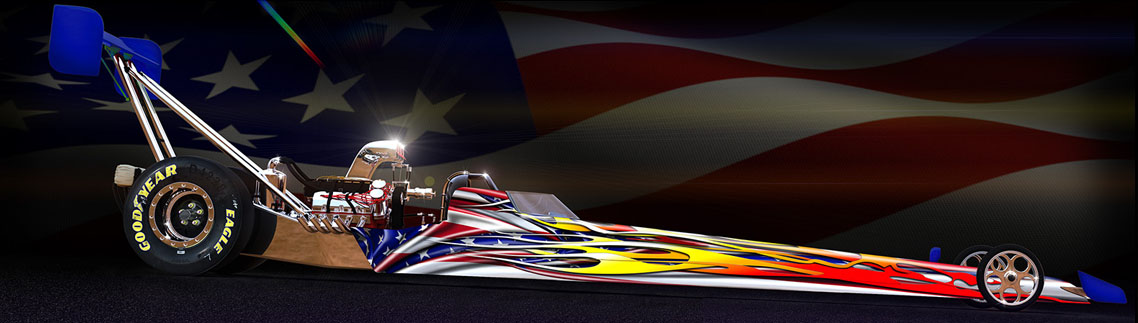
The one thing that's just as thrilling as the thunder of an asphalt assaulting dragster, is the look that goes with it!
Before you commit, verify your selection. Use the links below to confirm you've chosen the exact title you desire before proceeding to cart.
Find some useful tips by clicking through the tabs in the column.
This site contains large and X-Large images so that you can dive into the details. Best viewed (and appreciated) on a large screen.
![]()
BESPOKE ENGINEERING FOR YOUR UNIQUE MACHINE
The dragster world thrives on distinction, and your design must be engineered with the same specificity as your chassis. To initiate this precision process, we require your complete specifications.
STEP 1: DEFINE YOUR CANVAS
Specify the title of your chosen design and indicate your surface architecture—either a monolithic fiberglass body or segmented aluminum panels. This distinction is critical for optimal adhesion and visual continuity.
STEP 2: CAPTURE YOUR BLUEPRINT
Email us with strategic imagery of your dragster:
- A full profile shot capturing the complete side elevation
- An isometric view from the front quarter, showcasing depth and dimension
- A high-resolution reference of your nose cone—the focal point of your design's impact
STEP 3: PRECISION MAPPING
Our technical team will cross-reference your specifications against our extensive template library. Should additional details be required to achieve flawless execution, we'll initiate direct consultation with you.
TIMELINE TO DOMINANCE
- Proofing phase: 48 hours for meticulous refinement
- Production processing: Minimum 3 days for precision application
- Total standard timeline: Approximately 7 days from specification to shipment
- Expedited service available at a premium for those who require accelerated delivery
FINAL APPROVAL & PRODUCTION
Upon receipt of your remastered design, you'll receive a final proof for approval before we proceed to production—ensuring every element aligns with your vision before commitment.
INVESTMENT IN EXCELLENCE
A non-refundable setup fee of $149.00 initiates this bespoke process, securing your position in our production schedule and guaranteeing the attention to detail your machine deserves.
*Always start with a clean contaminant and dirt free surface.
A squeaky-clean surface is essential for a successful installation. If you can glide your finger across the surface and hear it squeak, that's a sure sign your prep is thorough.
This meticulous preparation will guarantee excellent results when mounting the panels onto your dragster's body and will ensure years of trouble-free performance by allowing the adhesives to form its strongest bond.
Here is the recommended process:
- Start by rinsing off any loose dirt and sand.
- Wash all surfaces thoroughly with dish soap and clean water.
- Once dry, wipe everything down with rubbing alcohol immediately before installation to remove any remaining contaminants like finger oils.
Crucial Notes:
- Do not use a Chamois cloth, as it contains fish oils that will interfere with adhesion. A dry, lint-free cloth works perfectly.
- Some industrial-grade automotive cleaners are more effective than rubbing alcohol, but always test them first on a hidden area to check for compatibility. Consult your supplier for details.
- NEVER use acetone or lacquer thinner unless you are absolutely certain the surface can withstand these harsh chemicals. Avoid them entirely on fiberglass, gel-coat, and many plastics.
- If you have old adhesive residue from previous decals, apply a generous amount of paint thinner or mineral spirits to a soft cloth, hold it on the sticky spot for a few seconds, and then wipe in a circular motion until it's completely gone.
- Be aware: petroleum-based products like paint thinner will leave a slight oily residue that hinders adhesion. Therefore, after using them, wipe the area down several more times with clean cloths and rubbing alcohol to restore a clean, bond-ready surface.
'Squeaky clean'
If it squeaks, you're good to go!
Dirt, grease and wax free!
Handle the panels carefully by gripping them several inches in from the finished edges. Keeping the adhesive at the edges clean and untouched is crucial for a lasting, airtight seal.
Working Environment:
- Keep it clean: Maintain a tidy workspace, especially the floor.
- Lighting & Temperature: Work in a well-lit area with an ambient temperature around 70°F (21°C) or warmer.A heated garage or shop away from drafts is ideal, as wind can disrupt control during installation.
- Why warmth matters: Warm panels and graphics are more pliable and easier to install. However, excessive heat can make the vinyl too soft. Be careful not to overstretch the print, especially when aligning it with adjoining panels.
- Using heat lamps: Quartz work lamps can help maintain warmth directly on the panels and vinyl, which also promotes better adhesion.
- Avoiding the cold: In cold conditions, vinyl becomes stiff and "snappy," making installation difficult. A good test: if you can gently peel back a section and it releases quietly and smoothly, the temperature is suitable. If you hear a sharp, snapping sound and the vinyl is rigid, it’s too cold—pause and warm the environment before continuing.
- Application method: True 'wrap' media is always apply dry so it stays in position while you work it over the contours. *We only use wrap.
If you have any questions before starting, feel free to contact the studio for technical support.
More about 'wrap'
'Wrap' vinyl is intentionally thinner than most other materials and is designed specifically for smooth surfaces. However, installing it during a very hot summer day can make the material overly soft, which can reduce your control and make precise placement difficult.
If high temperatures are unavoidable, you may need to use a 'wet' application method, as this will give you extra working time.
*This is not advised unless you are highly qualified - thus do at your own risk.
On the other hand, experienced installers can actually use the heat to their advantage, especially when wrapping complex, curved organic shapes. Wrap media, while more expensive, is often the preferred choice for professionals and is all we ever use.
If you lack experience with this high-performance material, it's strongly recommended to hire a professional installer rather than risk damaging a panel.
Most commercial sign shops will have staff who are skilled in handling and manipulating this type of vinyl over complex shapes and should be able to provide a project quote.
*When seeking a professional installation, always obtain at least two estimates before moving forward.
Caring for your newly installed graphics is just like maintaining a brand-new car. Wash them with soapy water when needed and apply a coat of wax to preserve their glossy, showroom-fresh appearance for years to come.
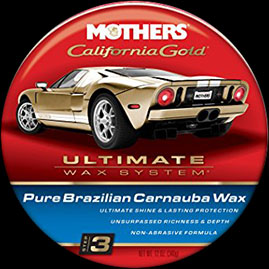
I have used Mothers Carnauba for years, and highly recommend it.
A key advantage of choosing vinyl graphics over custom paint is ease of repair. If your dragster gets a ding, scratch, or even needs a major panel replacement, the fix can be completed in far less time.
More importantly, the cost will be just a few dollars rather than the hundreds required for a professional paint booth. Thanks to the precision engineering of the 3M media we use, small areas can often be patched so seamlessly that the repair is practically invisible.